Why Two Zaps?
Zapier tasks have execution time limits that vary by plan. Since video rendering can take several minutes, a single Zap that submits a render request and waits for completion could exceed these limits or consume unnecessary task credits. By splitting the workflow into two Zaps, each Zap completes quickly:- Zap 1 submits the render request and writes the job ID to the spreadsheet (completes in seconds)
- Zap 2 receives a webhook callback when rendering finishes and updates the spreadsheet with the video URL (completes in seconds)
Architecture Overview
Before You Begin
Ensure you have the following:- A Pictory API key (get one here)
- A Zapier account (free or paid)
- A Google account with access to Google Sheets
- A Google Sheets spreadsheet set up with the required structure (described below)
Google Sheets Setup
Create a Google Sheets spreadsheet with two sheets: Videos and Video Trigger.Sheet 1: “Videos”
This is the primary data sheet that stores video entries and their rendering results. Set up the following column headers in row 1:- Video Name: A descriptive name for the video
- Story: The full story text that Pictory will convert into video scenes
- Review Status: Set to
approvedwhen the row is ready for rendering
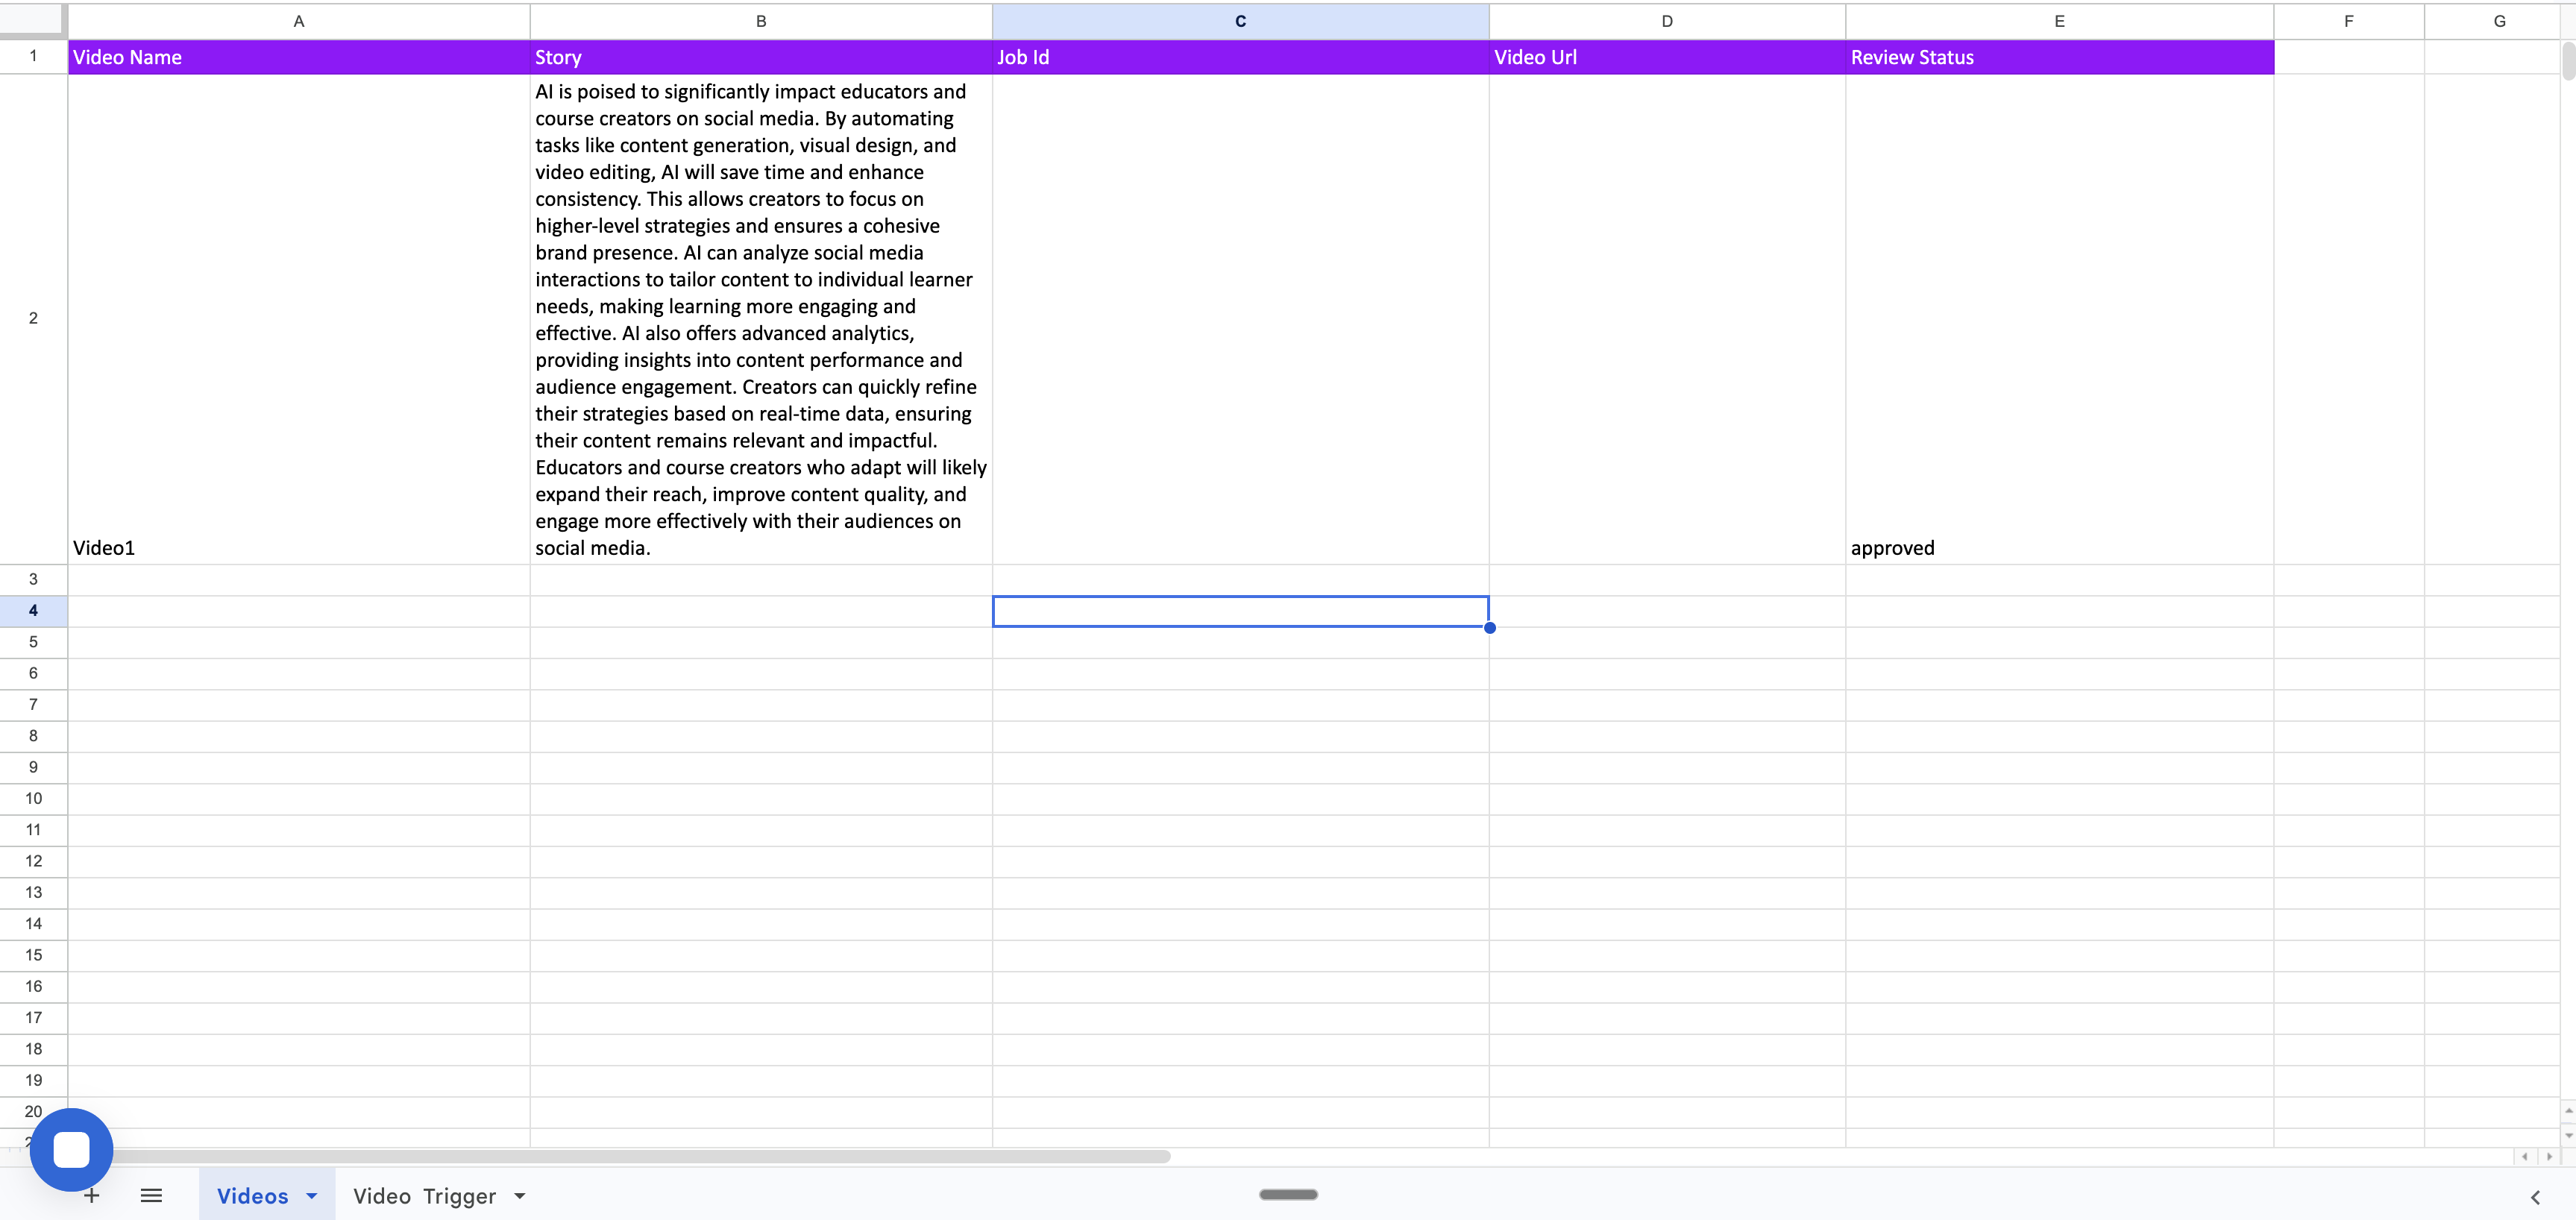
Videos sheet: Initial state with video name, story text, and review status set to approved
Sheet 2: “Video Trigger”
This sheet controls when Zap 1 runs. It contains a single column: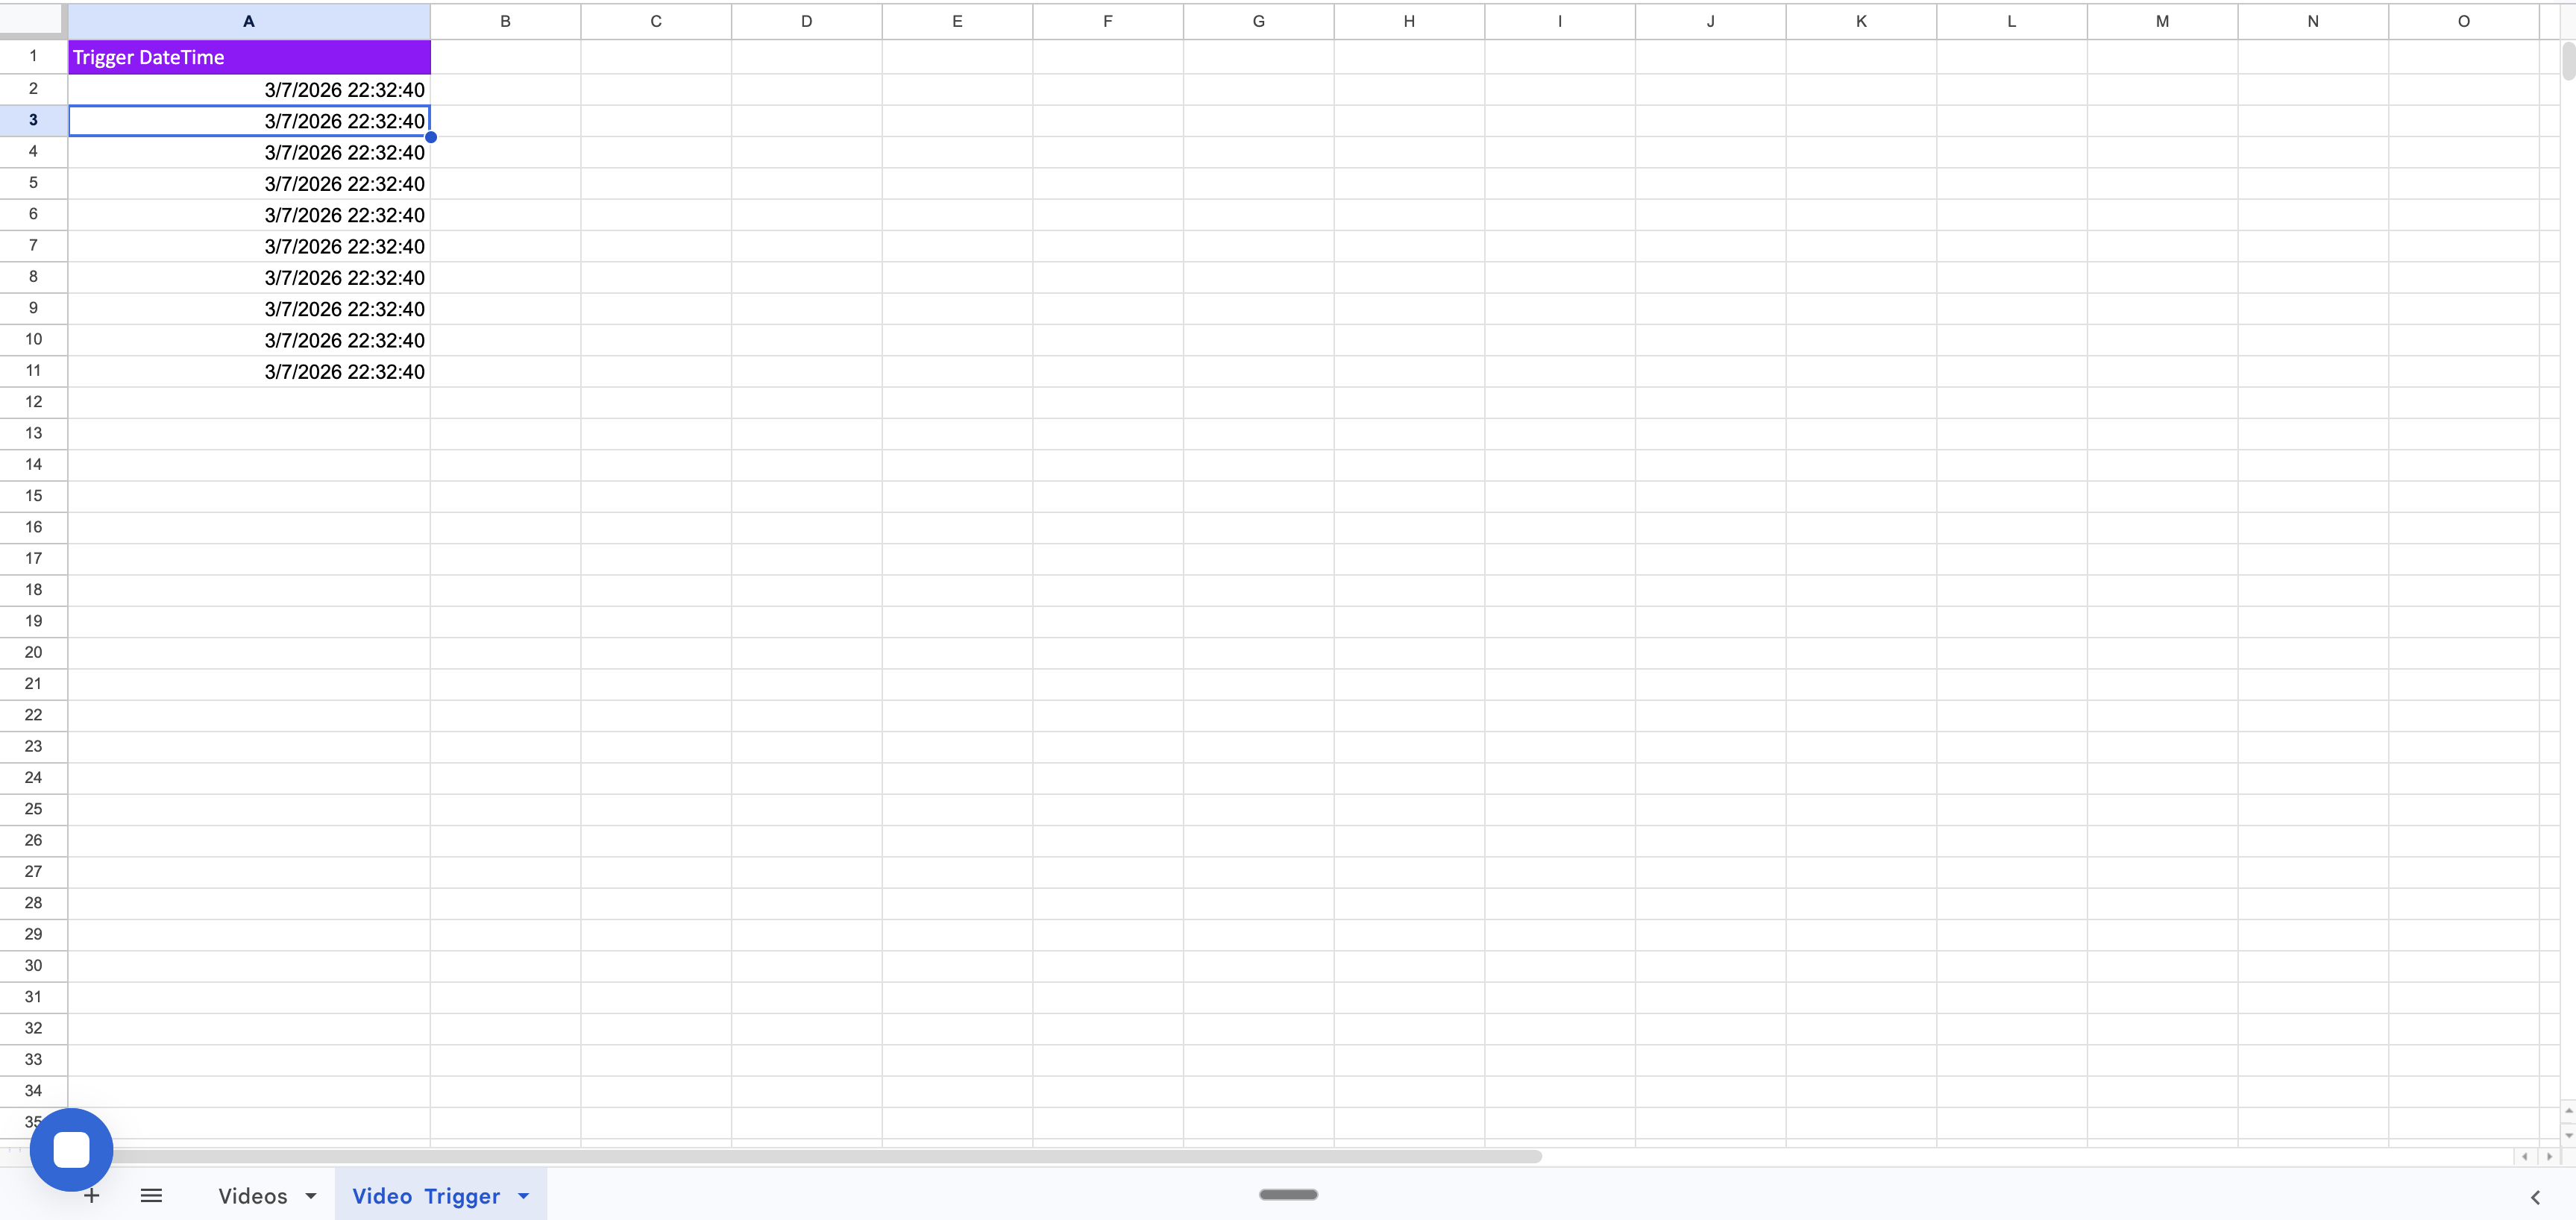
Video Trigger sheet: Adding a datetime value triggers a new Zap execution
Spreadsheet Data Flow
As the two Zaps execute, the Videos sheet progresses through the following states:State 1: Ready for Rendering
The row contains the video name, story text, and review status set toapproved. The Job Id and Video Url columns are empty.
State 1: Video entry with story text and review status set to approved, ready for rendering
State 2: Render Submitted (After Zap 1)
After Zap 1 executes, it submits the render request to Pictory and writes the returnedjobId into the Job Id column. The review status remains approved while the video is being rendered in the Pictory cloud.
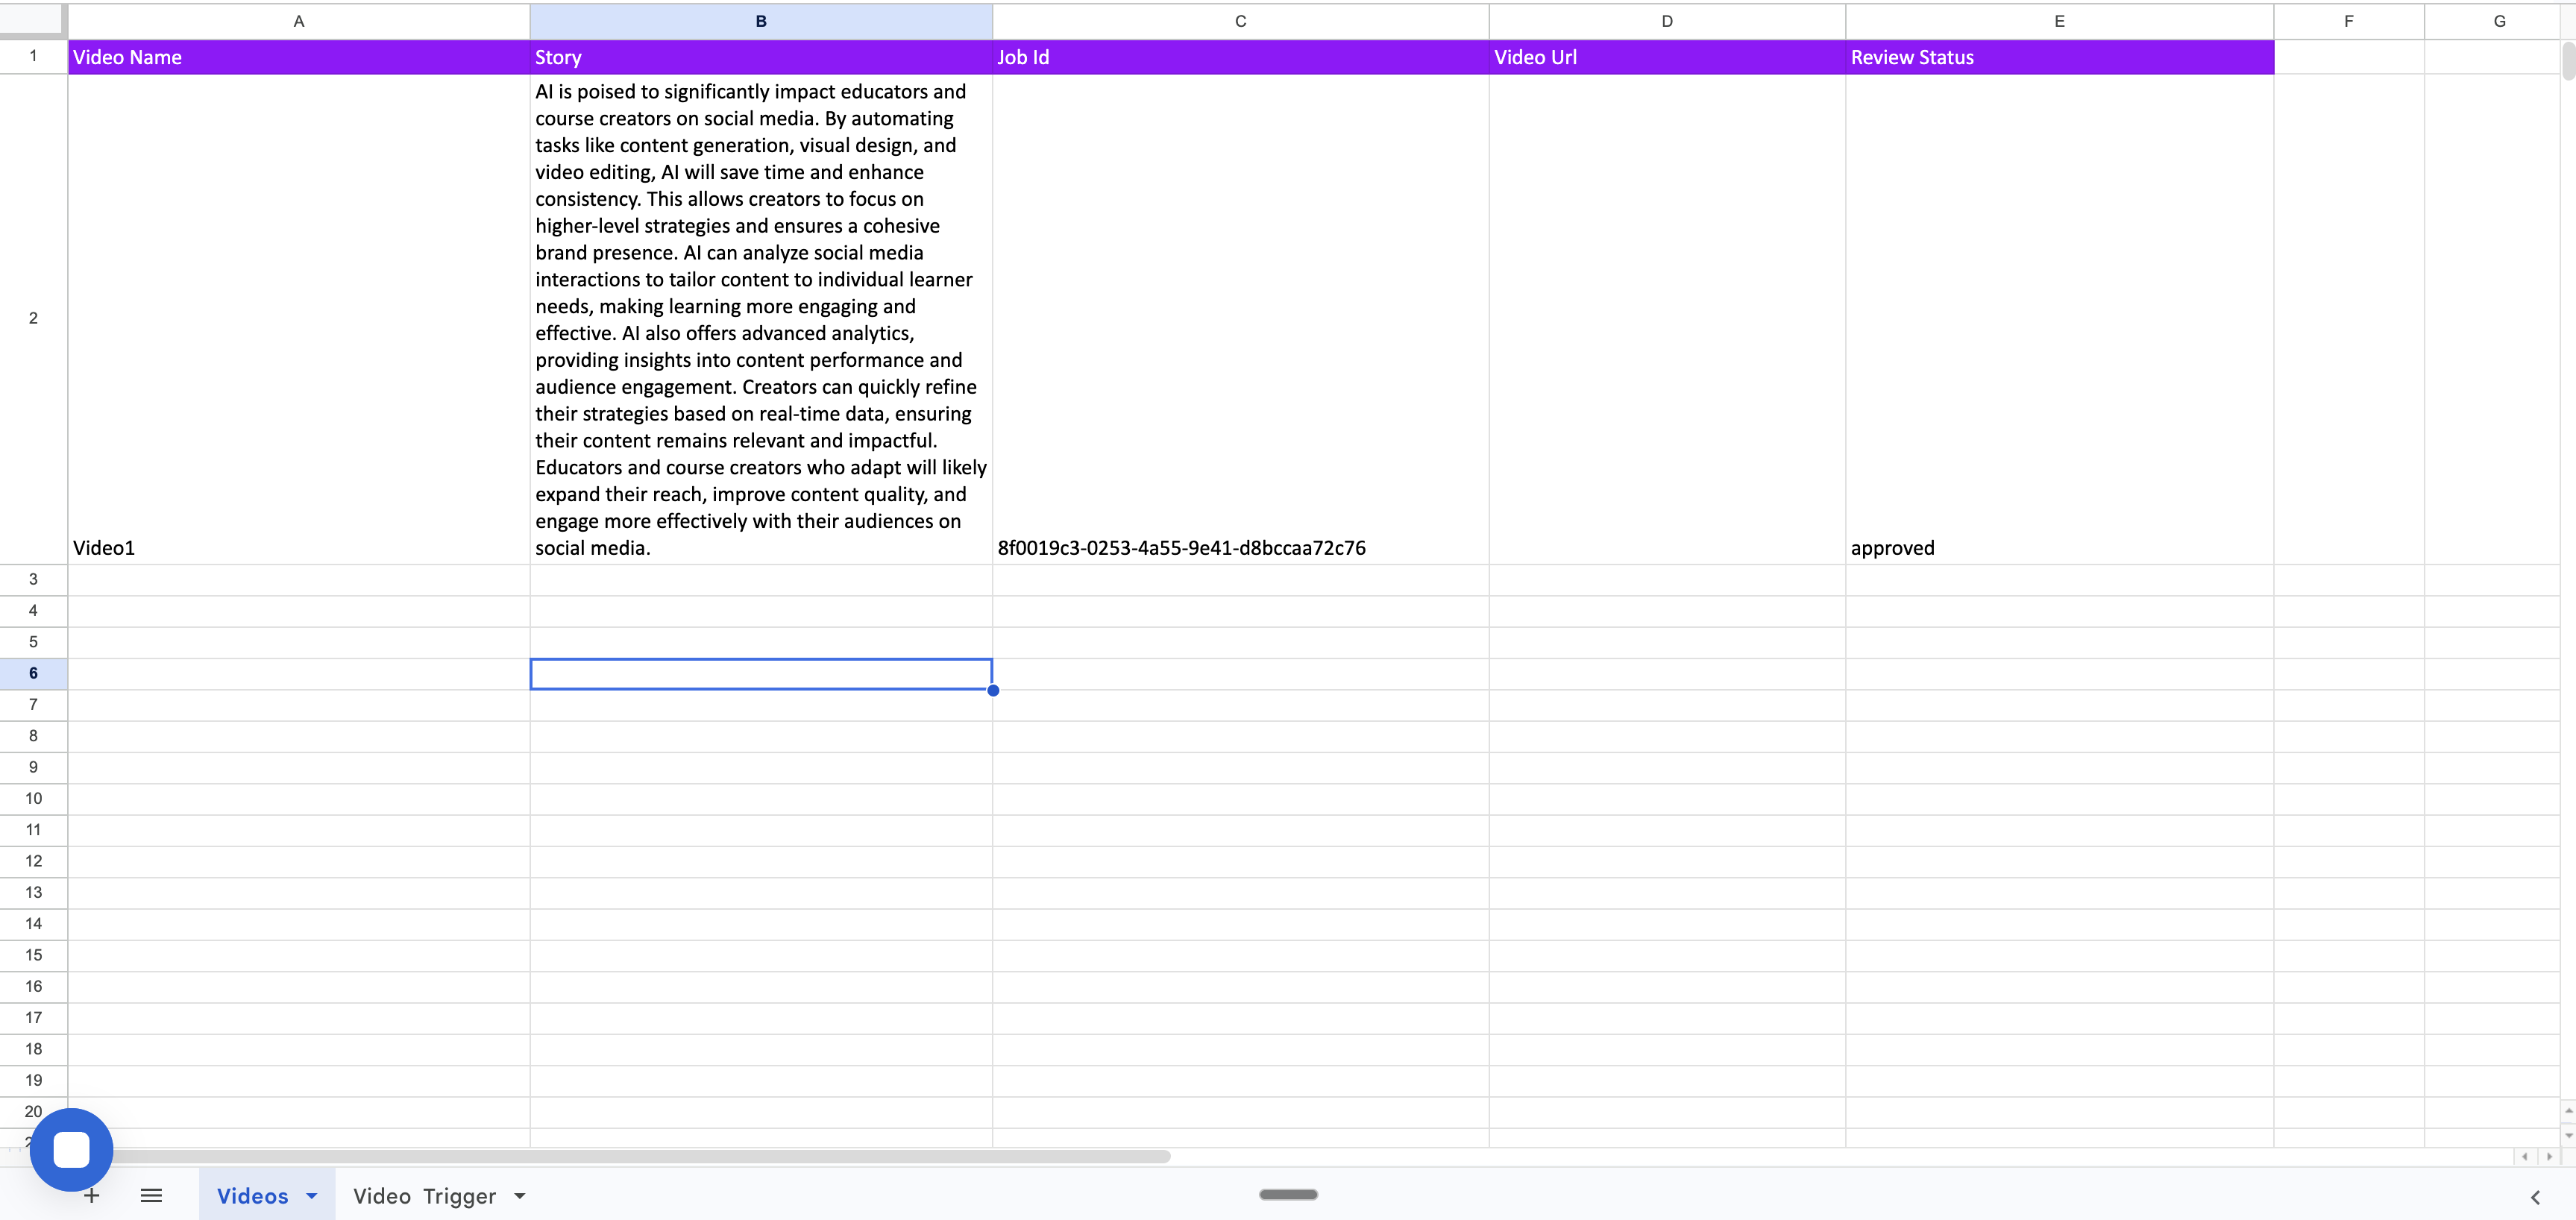
State 2: Job Id populated after Zap 1 submits the render request to Pictory
State 3: Rendering Complete (After Zap 2)
When Pictory finishes rendering the video, it sends a webhook callback to Zap 2. The Zap locates the row by matching the job ID, writes the rendered Video Url, and updates the Review Status fromapproved to done.
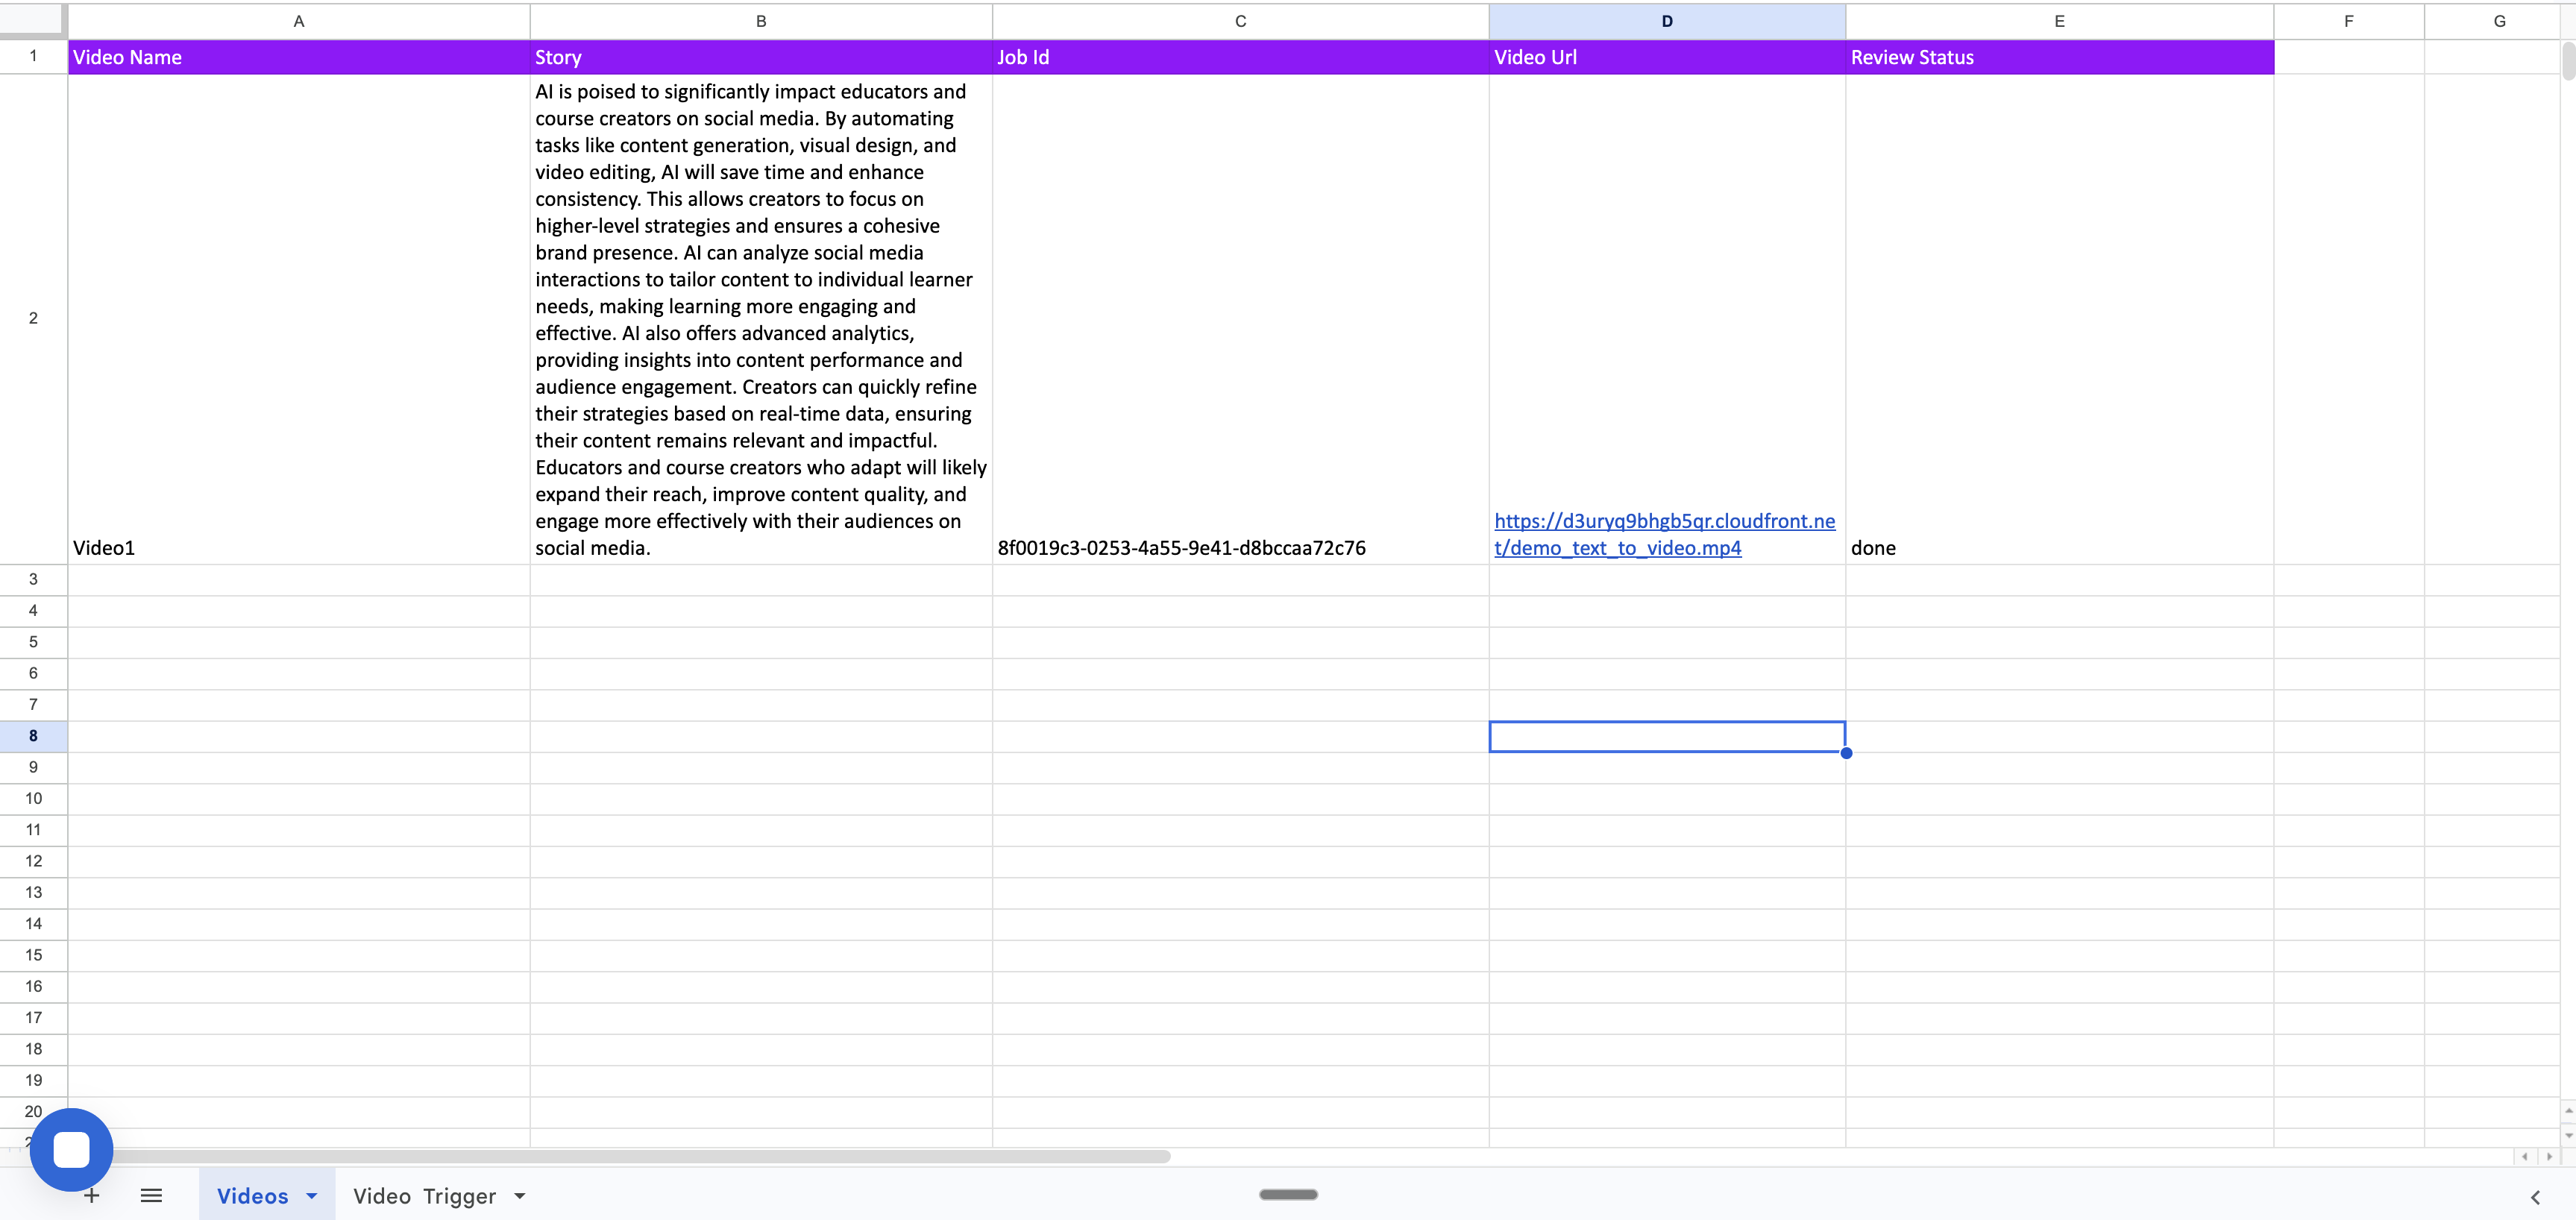
State 3: Video URL populated and review status updated to done after successful rendering
Zap 1: Render Text to Video from Google Spreadsheet
This Zap watches for new rows in the trigger sheet, finds approved video entries, loops through each one, submits them to the Pictory Render API, and writes the job ID back to the spreadsheet.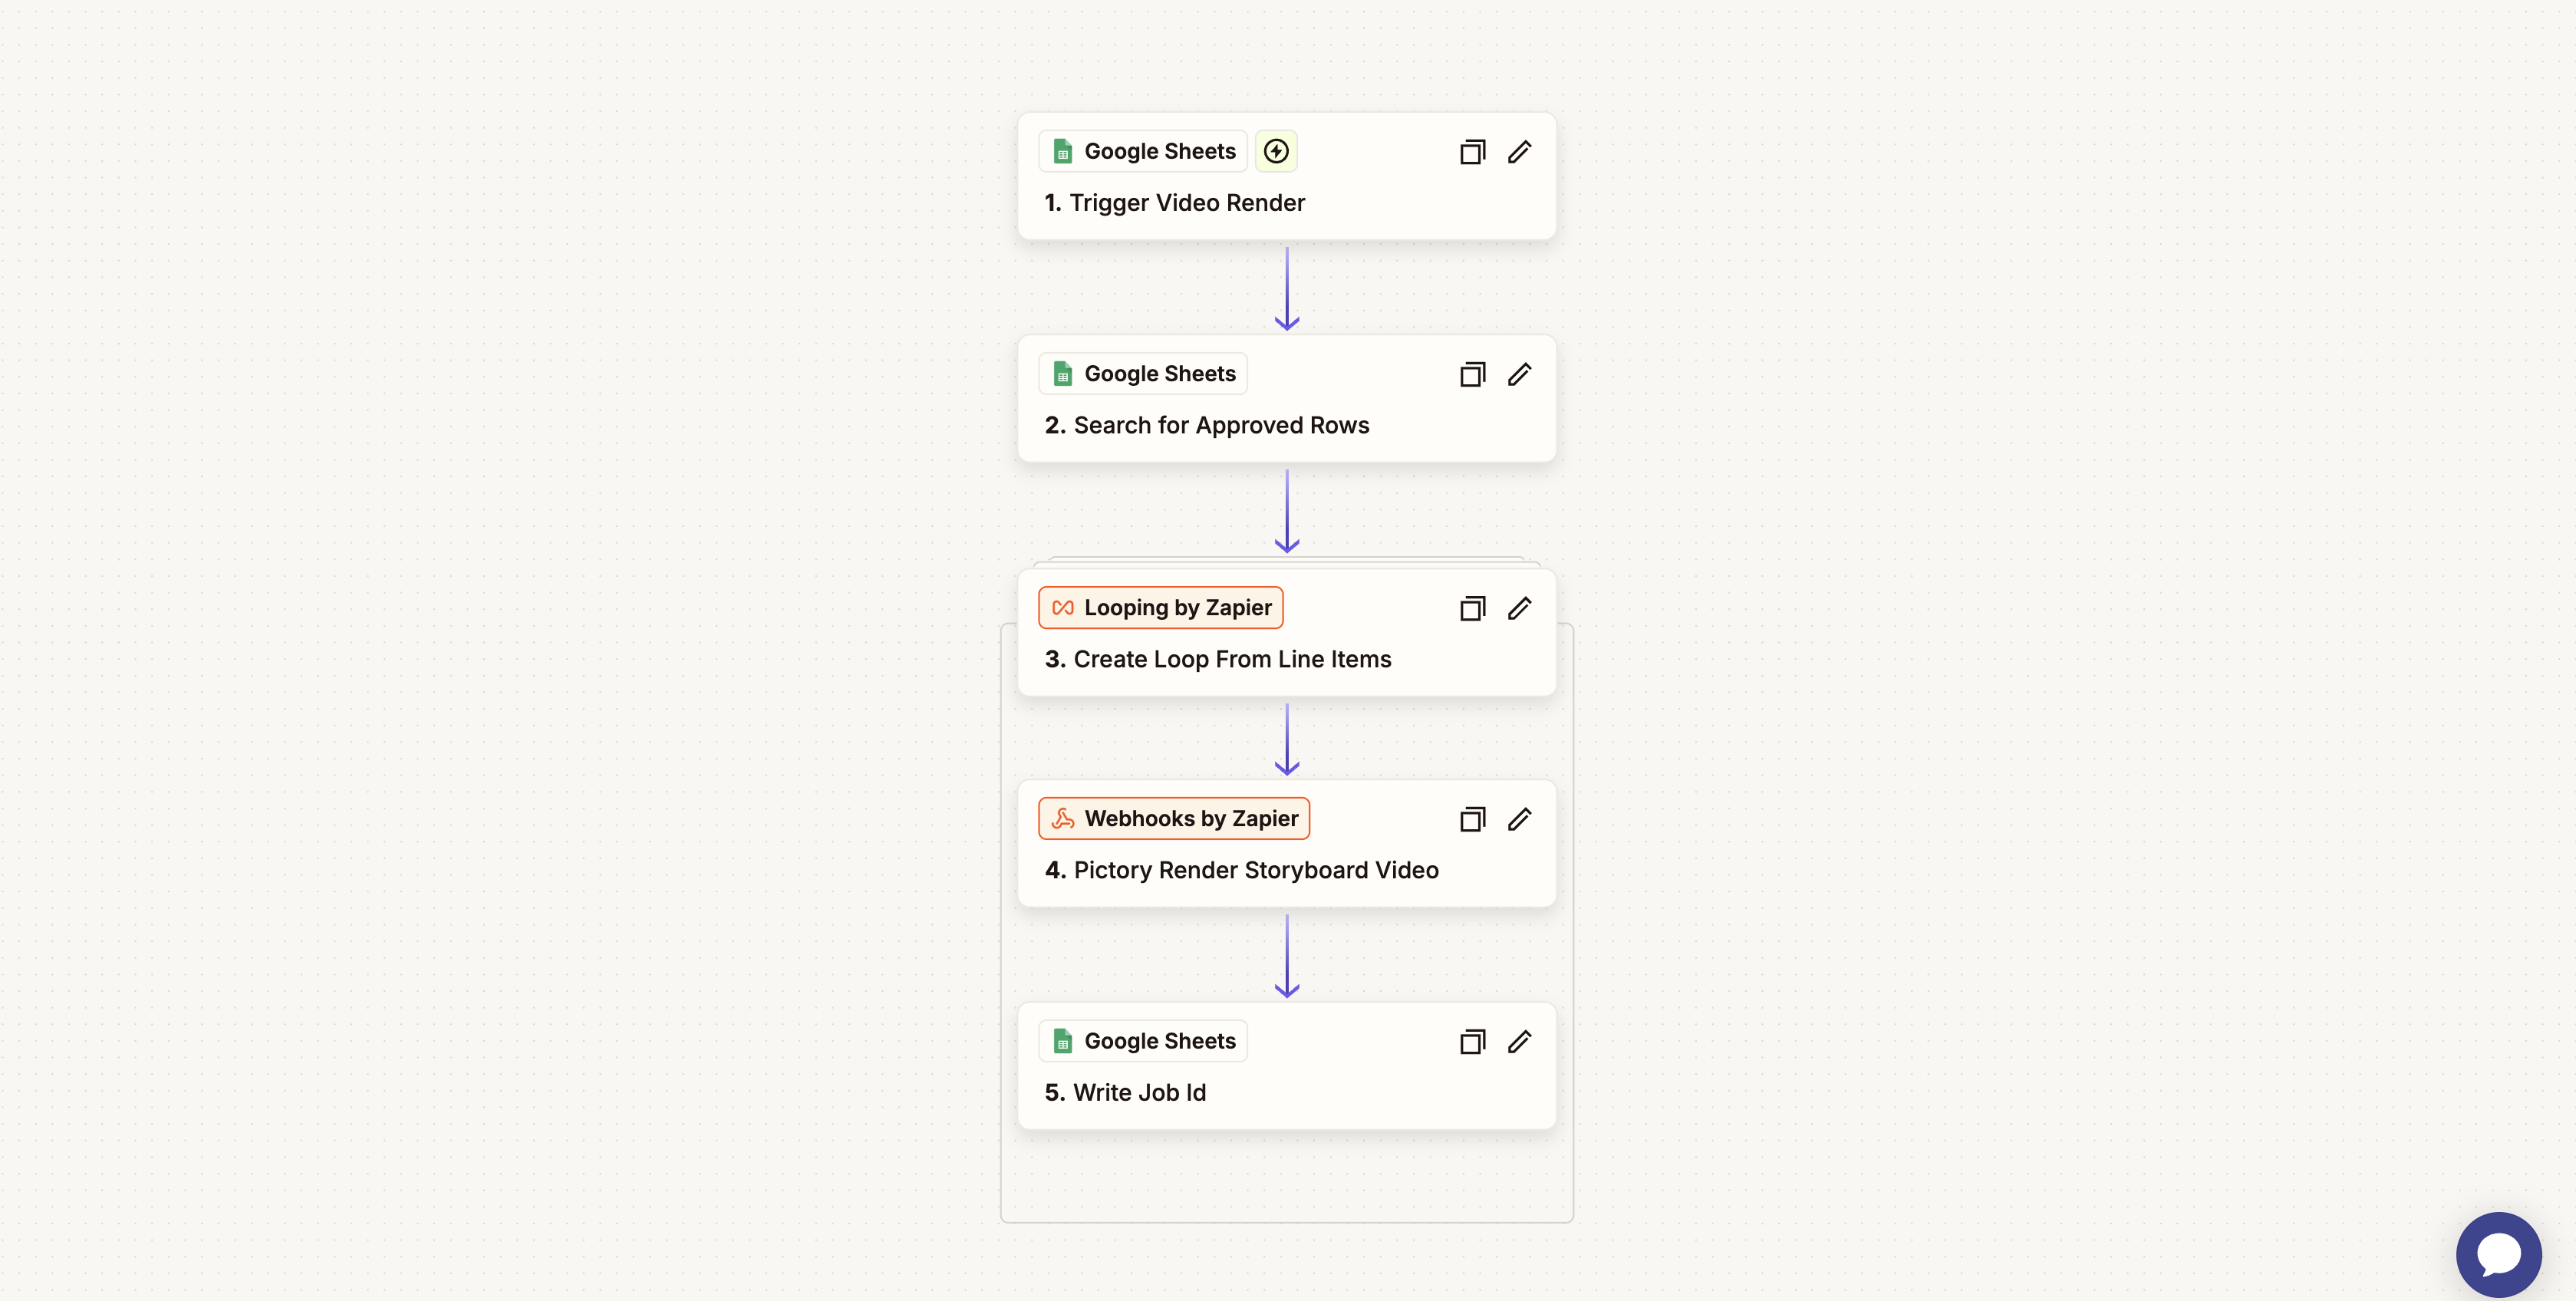
Zap 1: Render Text to Video from Google Spreadsheet
Step Breakdown
1. Trigger Video Render (Google Sheets: New or Updated Spreadsheet Row)
2. Search for Approved Rows (Google Sheets: Lookup Spreadsheet Row)
approved. Only approved entries proceed to the rendering step. The search returns up to 10 matching rows from the bottom of the sheet.
3. Create Loop From Line Items (Looping by Zapier)
4. Pictory Render Storyboard Video (Webhooks by Zapier: Custom Request)
POST request to the Pictory Render Storyboard Video API with the following configuration:
Headers:
Content-Type:application/jsonAuthorization: Your Pictory API key
jobId that uniquely identifies the rendering job.
5. Write Job Id (Google Sheets: Update Spreadsheet Row)
jobId returned by the Pictory API into the Job Id column of the corresponding row. This value is used by Zap 2 to locate the correct row when the webhook fires. The row is updated in place, preserving all existing column values.
Zap 2: Video Rendered Webhook
This Zap listens for webhook callbacks from Pictory when a video finishes rendering, then updates the spreadsheet with the video URL and marks the row as completed.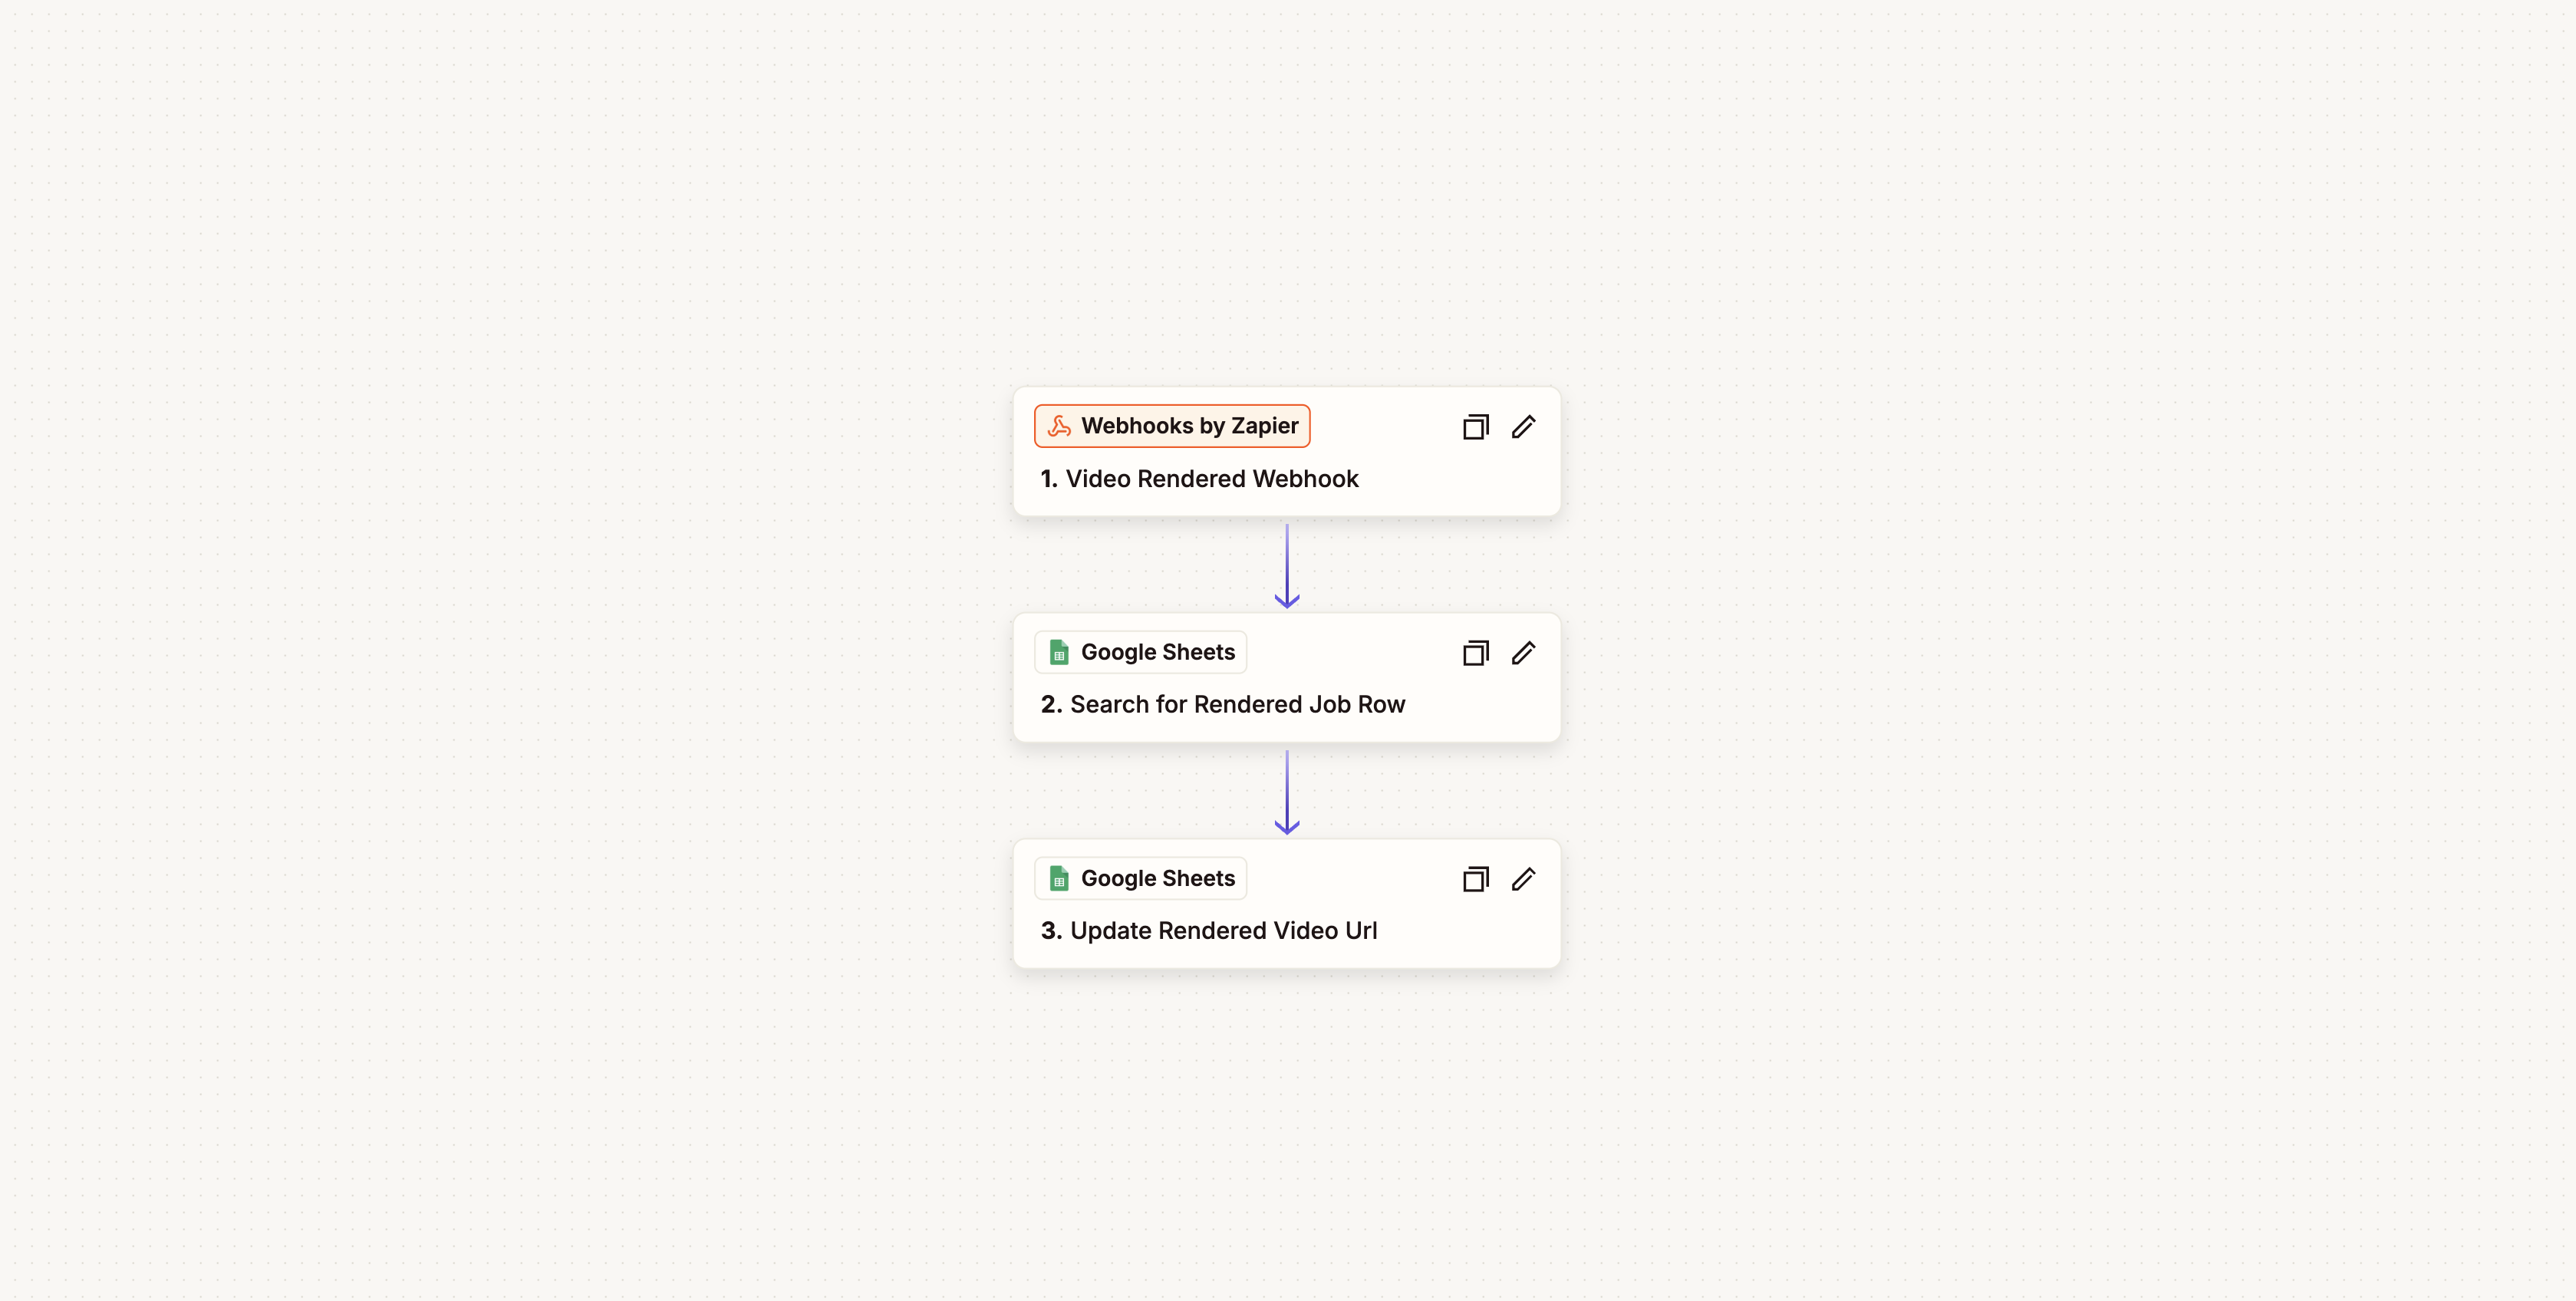
Zap 2: Video Rendered Webhook
Step Breakdown
1. Video Rendered Webhook (Webhooks by Zapier: Catch Hook)
POST request to this webhook URL with the following payload:
webhook field of the Pictory API request body in Zap 1.2. Search for Rendered Job Row (Google Sheets: Lookup Spreadsheet Row)
job_id received from the webhook. This correlates the webhook callback with the correct video entry.
3. Update Rendered Video Url (Google Sheets: Update Spreadsheet Row)
approved to done, indicating that the video has been successfully rendered and the URL is available.
Import the Zaps
Both Zaps are available as pre-configured JSON files that can be imported into your Zapier account via the Zapier Transfer tool. These files contain the complete step configuration, app connections, and data mappings. Download the Zap files before proceeding:- Render Text To Video From Google Sheet (Zap 1)
- Pictory Video Rendered Webhook (Zap 2)
Step-by-Step Import and Configuration
Follow this order to ensure the webhook URL is available when configuring Zap 1. Zap 2 must be created first because it generates the webhook URL that Zap 1 needs.Prepare Your Google Spreadsheet
approved.Create Zap 2 (Video Rendered Webhook)
- Log in to your Zapier account
- Click Create in the top navigation bar and select New Zap
- For the trigger, search for Webhooks by Zapier and select Catch Hook as the trigger event
- Click Continue. Zapier generates a unique webhook URL. Copy this URL; it is required when configuring Zap 1
- Optionally, click Test trigger to verify the webhook is active (you can send a test payload later)
Add the Search Step to Zap 2
- Click the + button to add a new step
- Search for Google Sheets and select Lookup Spreadsheet Row as the action
- Connect your Google account when prompted
- Select your spreadsheet and choose the Videos sheet
- Set the Lookup Column to Job Id (Column C)
- Map the Lookup Value to
{{job_id}}from the webhook trigger data
Add the Update Step to Zap 2
- Click the + button to add another step
- Search for Google Sheets and select Update Spreadsheet Row as the action
- Use the same Google Sheets connection
- Select your spreadsheet and choose the Videos sheet
- Set the Row field to the row number from the Lookup step
- Map Column D (Video Url) to
{{data__videoURL}}from the webhook payload - Set Column E (Review Status) to
done
Activate Zap 2
Create Zap 1 (Render Text to Video from Google Spreadsheet)
- Go back to the Zapier dashboard and click Create then New Zap
- For the trigger, search for Google Sheets and select New or Updated Spreadsheet Row as the trigger event
- Connect your Google account and select your spreadsheet
- Choose the Video Trigger sheet and set the Trigger Column to Trigger DateTime
Add the Search Step to Zap 1
- Add a new step with Google Sheets and select Lookup Spreadsheet Row
- Select your spreadsheet and choose the Videos sheet
- Set the Lookup Column to Review Status (Column E)
- Set the Lookup Value to
approved
Add the Looping Step to Zap 1
- Add a new step with Looping by Zapier and select Create Loop From Line Items
- Map the input values from the search results: Story, Row Number, Video Name, and Review Status
- This step iterates through each matched row individually for processing
Add the Pictory API Step to Zap 1
- Add a new step with Webhooks by Zapier and select Custom Request
- Set the Method to
POST - Set the URL to
https://api.pictory.ai/pictoryapis/v2/video/storyboard/render - Add the following headers:
Content-Type:application/jsonAuthorization: Your Pictory API key (e.g.,pictai_xxxx...)
- Paste the JSON request body (shown in the Pictory Render Storyboard Video section above) into the Data field
- Replace
YOUR_ZAP_2_WEBHOOK_URLwith the webhook URL you copied from Zap 2 in Step 2 - Map the
storyfield to the story value from the Looping step
Add the Write Job Id Step to Zap 1
- Add a new step with Google Sheets and select Update Spreadsheet Row
- Select your spreadsheet and choose the Videos sheet
- Set the Row field to the row number from the Looping step
- Map Column C (Job Id) to
{{data__jobId}}from the Webhooks step response - Preserve the existing values for Columns A, B, and E by mapping them from the Looping step
Activate Zap 1 and Trigger a Run
- Click Publish to activate Zap 1. Zapier will poll for new rows on the “Video Trigger” sheet at regular intervals based on your plan.
- To initiate your first video render, add a datetime value (e.g., the current date and time) to a new row in the Video Trigger sheet
- During the next polling cycle, Zap 1 detects the new row, identifies approved entries in the Videos sheet, submits the render request, and writes the job ID back to the spreadsheet
- Upon rendering completion, Pictory sends a webhook callback to Zap 2, which updates the video URL and sets the review status to
done
Zapier vs Make.com: Key Differences
If you are familiar with the Make.com integration, note the following differences in the Zapier implementation:Best Practices
Secure Your API Key
Secure Your API Key
Monitor Webhook Delivery
Monitor Webhook Delivery
Handle Rendering Failures
Handle Rendering Failures
success field. You can add a Filter step or Paths step after the webhook trigger to handle failed renders separately, such as sending an email notification or updating the spreadsheet with an error status.Batch Processing
Batch Processing
approved, then add a trigger row to the “Video Trigger” sheet.Free Plan Considerations
Free Plan Considerations
Troubleshooting
Webhook Not Receiving Callbacks
Webhook Not Receiving Callbacks
- Confirm that Zap 2 is published and active
- Open the Catch Hook trigger in Zap 2 and copy the webhook URL
- Verify that the
webhookfield in the Pictory API request body in Zap 1 exactly matches this URL - Check Zap History for both Zaps to review execution logs
Spreadsheet Row Not Updating
Spreadsheet Row Not Updating
- Open each Google Sheets step and verify the connection is active
- Reconnect your Google account if prompted
- Confirm that the spreadsheet name and sheet names match your Google Sheets document
- Verify that column references (C, D, E) align with your spreadsheet structure
Looping Step Not Processing All Rows
Looping Step Not Processing All Rows
- Open the Search for Approved Rows step and verify it returns results in the expected format
- In the Looping step, ensure each input value (Story, Row, Video Name, Review Status) is mapped to the correct field from the search results
- Test the search step independently to confirm it returns the expected rows